Thursday, September 17, 2020

Reactive forms in angular

 In angular we can create two types of forms 1. Reactive form 2.template based form

  1. In Reactive form : all the codes handle in type script , no need to use ngModel to get and set value in control. we define form and formcontrolname for each control , and through formControl we get and set value .reactive form code is neat and clean when we have more complex structure or validation we should use reactive form .will see more detail .
  2. Template driven : data binding is done via ngModel ,generally we can use this approach for simple form ,in this approach code became messy and very difficult to manage . Also in this approch difficult to handle all validation ,need more coding.

So , I like to go with Reactive form approach instead of Template based. In our tutorial all forms will be reactive , but we can use both approach if required. I am going to create empoloyee form which will have below fields :

  1. Employee Id ,Employee Name, email Id,Mobile Number,Password etc.. our final output will be as below :
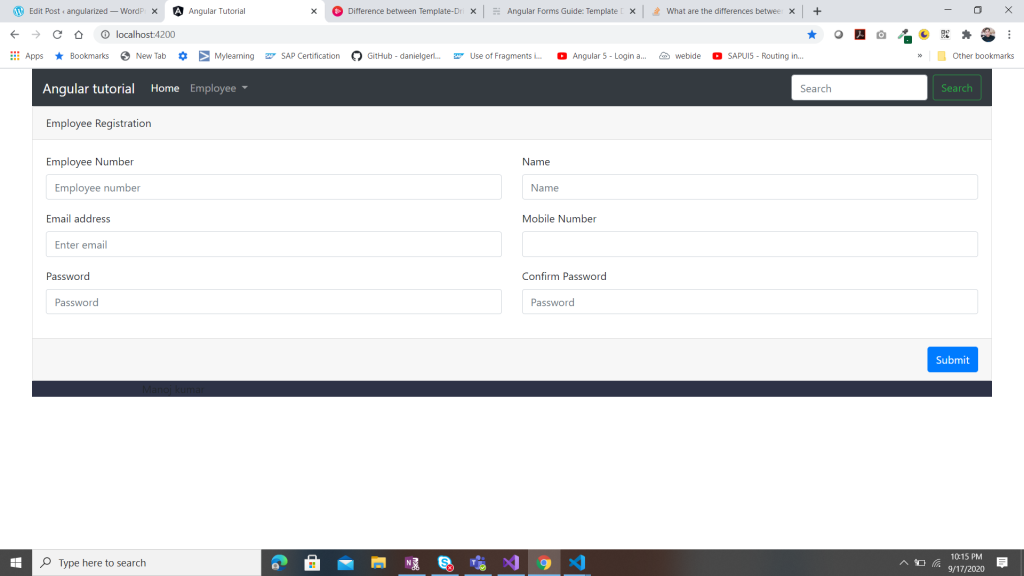
Employee Registration formI

I have already generated "Employee" component . In previous lesson we know that any component have 4 files , .html, .ts,.css and .spec.ts. here we will focus only on 3 files. spec.ts will see in later tutorial. so to create form like above

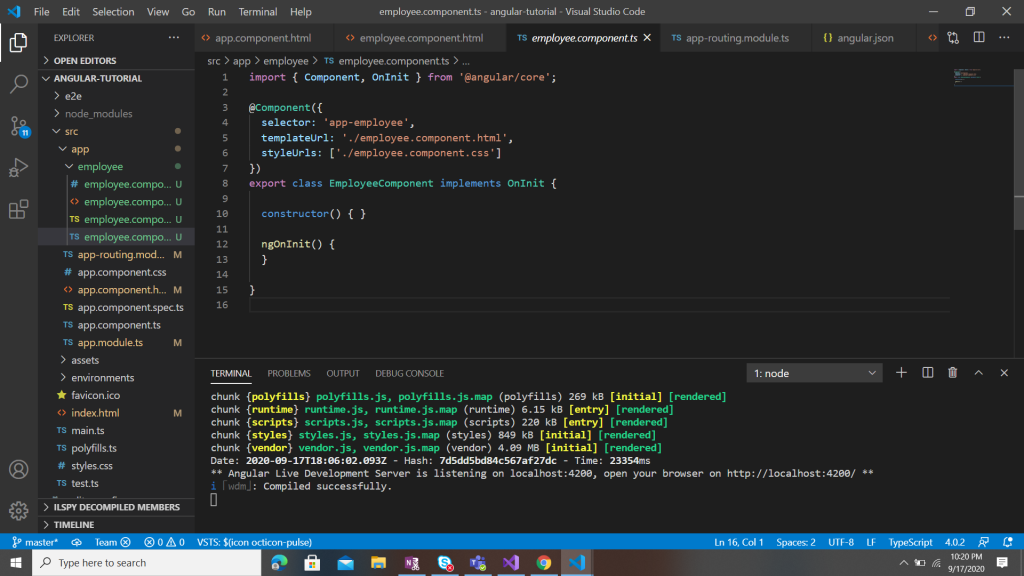
    1. Open employee.component.ts file , default structure of this file will look like :
    In order to enable reactive form open app.module.ts and import below import { FormsModule, ReactiveFormsModule } from '@angular/forms'; in import section add ReactiveFormsModule ,FormsModule.
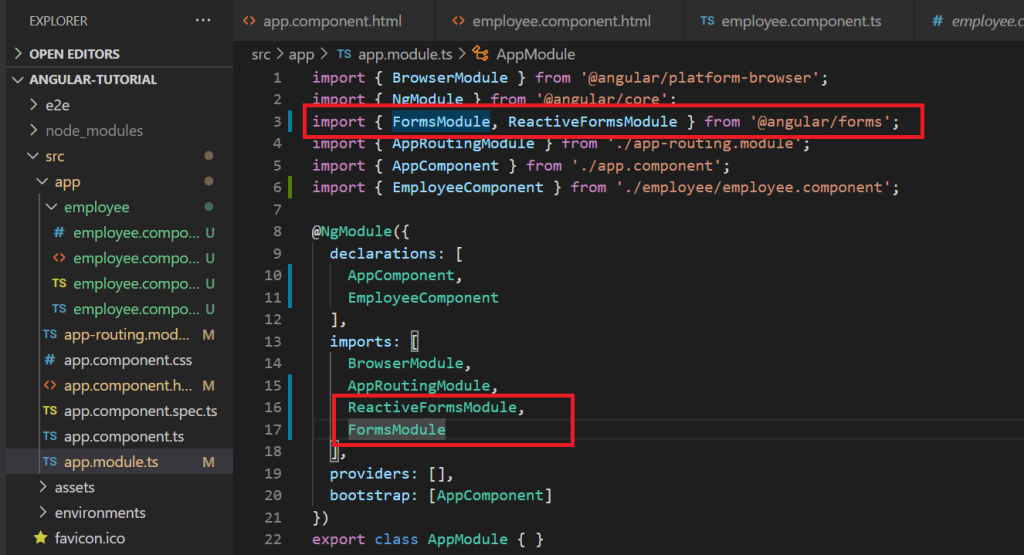
In order to enable reactive form open app.module.ts and import below import { FormsModule, ReactiveFormsModule } from '@angular/forms'; in import section add ReactiveFormsModule ,FormsModule.

Now come back to employee.component.ts and add following code :

import { FormGroup, FormBuilder, Validators } from '@angular/forms';

inject dependency of formBuilder inside constructor like :  constructor( private formBuilder: FormBuilder) { }

define formgroup name employeeForm like below:

employeeForm :FormGroup;

inside ngOnInit fn create form controls -

ngOnInit() {    this.employeeForm = this.formBuilder.group({

      employeeId: ['', Validators.required],

      name: ['', Validators.required],

      email: ['', Validators.required],

      mobile: ['', Validators.required],

      password:['', Validators.required],

      confirmPassword:['', Validators.required]

    });

  }

so , inside ngOnInit we define our form fields ,which are basically formContolName which will be bind with control in html. and by refering this we can get or set value from controls. So now .ts file will looks like :


lets open .html : 1. defined formGroup for inside form tag <form [formGroup]="employeeForm"

employeeForm is the same formgroup which we have defined inside .ts file . now all formConrolName can be access and bind with control inside employeeForm : to bind control use "formControlName" directives with control. like : <input type="text" class="form-control"  formControlName="employeeId" placeholder="Employee number"> .full code of our html file will be as below:

<form [formGroup]="employeeForm">

  <div class="card">

    <div class="card-header">

      Employee Registration

    </div>

    <div class="card-body">

      <div class="row ">

        <div class="col-md-6">

          <div class="form-group">

            <label>Employee Number</label>

            <input type="text" class="form-control" formControlName="employeeId" placeholder="Employee number">

          </div>

          <div class="form-group">

            <label>Email address</label>

            <input type="email" class="form-control" formControlName="email" aria-describedby="emailHelp"

              placeholder="Enter email">

          </div>

        </div>

        <div class="col-md-6">

          <div class="form-group">

            <label>Name</label>

            <input type="text" class="form-control" formControlName="name" placeholder="Name">

          </div>

          <div class="form-group">

            <label>Mobile Number</label>

            <input type="number" class="form-control" formControlName="mobile">

          </div>

        </div>

      </div>

      <div class="row ">

        <div class="col-md-6">

          <div class="form-group">

            <label>Password</label>

            <input type="text" class="form-control" formControlName="password" placeholder="Password">

          </div>

        </div>

        <div class="col-md-6">

          <div class="form-group">

            <label>Confirm Password</label>

            <input type="text" class="form-control" formControlName="confirmPassword" placeholder="Password">

          </div>

        </div>

      </div>

    </div>

    <div class="card-footer">

      <button type="submit" class="btn btn-primary float-right"> Submit</button>

    </div>

  </div>

</form>


So ,after running the above code our output will be :


Thats it. in next tutorial will see how to implement validations.....


Angular Project structure and default component

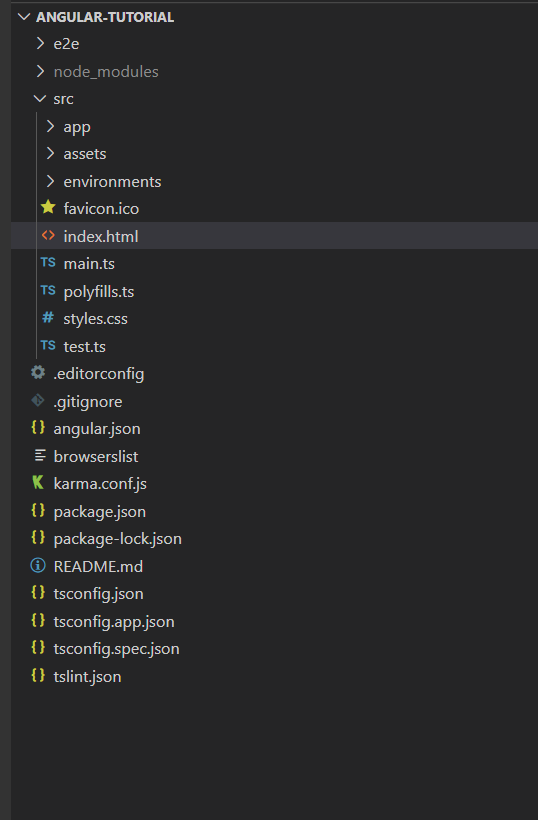
 In my first blog we learnt how to setup angular project and run default app which created by angular cli. In this blog we will learn how to set up own home page and routing. Before this lets have a look on project structure :

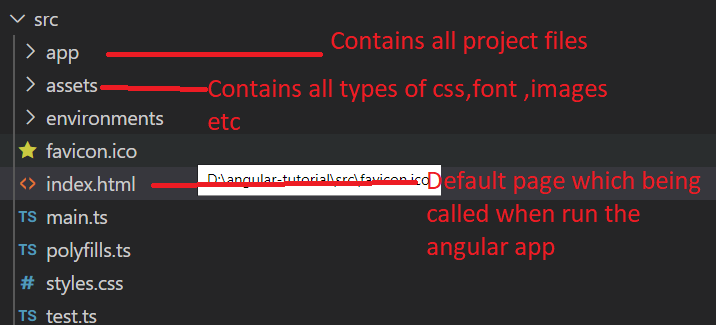
above project structure is being created by default when we create angular app . There are many folders and files but since we are in very begining stage so we will focus only src folder. When you expand the src folder you will see below folder and files :

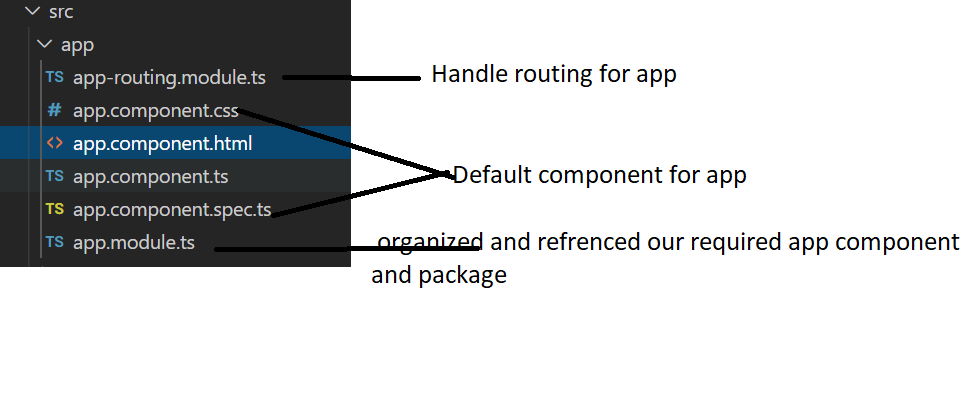
Lets expand src->app folder and understand this :

in app folder we have : 1. app-routing.module.ts : it handles routing for app ,for now we need to have little knowledge of this module ,later we will learn in details. In angular we create components like *.component.html -for our template file and *.component.ts for our typescript file. Since our focus is more on practical so I am not going in details about these. If you want you can follow the angular site. So when we need to add any template file(file which contains html code ) we create template. when we create component automatically 4 files gets created as you can see in above screen shot :1. app.component.html (for html code) 2.app.component.css (for template specifice styling) 3.app.component.ts (for typescript code) and app.component.spec.ts(here we will leave this for now just to avoid confusion). So our main focus will be on three component files.

As app.component is our home page so it loads inside the index.html :

<app-root> is the selector of app component ,if you open app.component.ts file you can see this. which has reference of app.component.html for template and app.component.html .css files

Here we should know that when we create any component/services/modules/packaged , cli automatically import these to app.module.ts . so if you open app.module.ts , our all component’s should be imported. Basically app.module should be having all the reference

now it time to create our first component and load it instead of having default page :

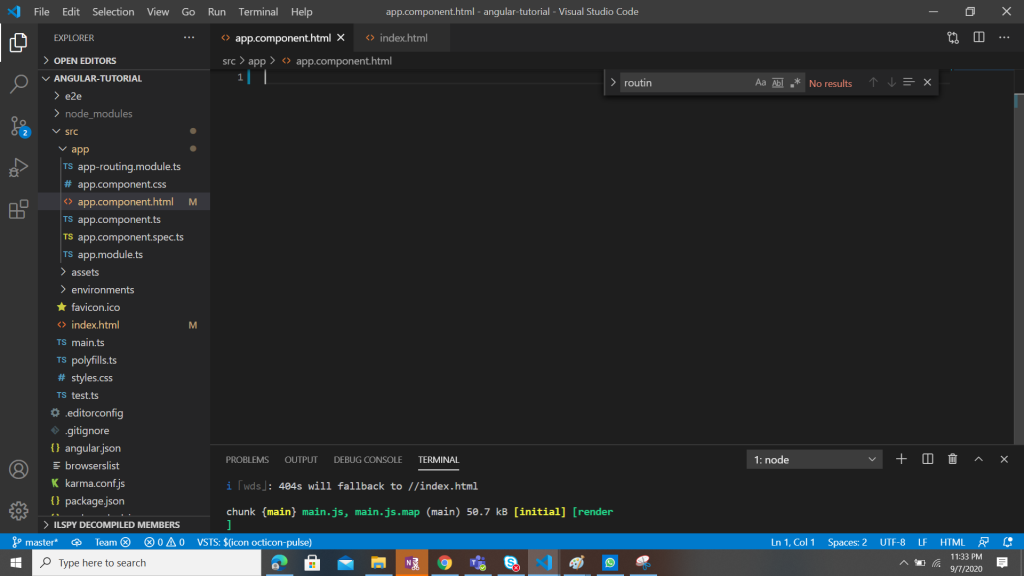
I am going to delete everything from app.component.html . I will save this file and browse http://localhost:4200/ . I should see blank page .

Now you write <header>  Hello this is my first angular app</header>

and hit ctrl+s and see in browser ,we should see our changes in default component

in next lesson we will learn how to add new component and routing. Leave comment in case of any confusion .Thanks ..

Angular Tutorial Step by Step for Beginners ::

 Dear Readers, This tutorial covers :

  1. Preparation of environment
  2. Creation of First angular project
  3. Run the default generated angular project
  4. creation of best architecture of project
  5. call apis with Http
  6. Create services for http call, error handling etc.
  7. Registration and login with JWT toke
  8. decode token and get data from token                                       

I believe the good way to learn anything new is to do more practical instead of theory . So after a short description will go straight for practical.

Lets see what is angular and why to use : Angular is a JavaScript based application design development framework for creating SPA(single page applications). Its a framework means it provides us all the required elements which are needed to develop a SPA. To understand more details kindly follow the https://angular.io/docs .

Preparation of environment : In order to start angular development we need to install some software as below :

  1. Node.js: can be installed latest version from https://nodejs.org/en/

  2. npm pacakge :  run npm -v in a terminal window :


3. Install vs code :https://code.visualstudio.com/download download window version and install in your pc.

4. Angular cli: angular cli creates your angular project , generate application and library code, and perform a variety of ongoing development tasks such as testing, bundling, and deployment . to install it type below command and hit enter :

npm install -g @angular/cli , this command can be run through vs terminal also . that will see later .After running this command latest angular cli will be installed in your pc , so for any application you no need to install seperately. If you want to install specific version kindly run the command :

1
npm install -g @angular/cli@versionthatyouwant

So , here we have all the required software to start development.

Lets create our first default angular project using vs code:

  1. open vs code – go to terminal ->new terminal and type below command in your folder location : ng new angular-tutorial (angular-tutorial is my project name) and hit enter . In the below screen shot I have created my project in d drive .

Once I hit enter I can see below option to select , for routing I will enter yes and enter then it asks me to choose stylesheet ,you can choose css/scss . since I am going to use css so I will choose css and press enter.

You can see something like below screen while creating new project :

Once project created go to file->open folder ->browse your newly created project and click on select folder . your project will be opened in vs code workspace.

To run this project : go to terminal->new terminal->type ng serve

If you want to build first then type ng build then ng serve . ng serve will build then run the application. after building you will see below url to browse your app.

Here you are ready to browse your first default angular app . open google chrome /browser and type http://localhost:4200 and you will see your app is running.

Here we have completed our lesson to setup and create first default project . In next lesson we will learn how to change and customize pages . In case of any doubt just leave message ☺


Convert Html to Pdf in azure function and save in blob container

 In this post  I am going to create an azure function ( httpTrigger ) and send html content  which will be converted into PDF and save in bl...