Friday, July 22, 2022

Get auth token from azure and use as authorization to call azure services

 In this tutorial I will show how can we generate authentication token from azure and use to call any rest api .

Scenario - Assume our requirement is to get token from azure and download one file from blob container by passing this token .

So Let’s follow below steps 

1. First login on azure portal and need to register an app.

GO to the azure portal and in search type "App Registrations" and click on the icon.


2. Next click on  "New Registration " and enter required data as below :


Name - tokenTestApp

Redirect url is optional here if you want you can enter as below after that click register


3. After successful registered app it will auto redirect to below screen - where you create client secret for this app


copy in your local  the value field from the client secret which is required in later stage . it shows only one time so don't forget to copy before leaving above page.

4. Now go to your resource and click on Access control from left menu .Click on Add button 


5. in the Role tab search with blob and you will find related predefined role ,select Storage Blob Data Contributor role and click next 


6. in member tab keep Assign access to default selection , click on select member and type your app name which you have created and click on select button . click review and assign


7. Now go back to your home -> App Registration -> Click tokenTestApp and click on API permission from left menu and click Add Permission


8. click on azure storage


9. Keep default selected delegated permission and check user impersonation and click Add Permission.


 Before we move in another section let copy required key value which need to use on later stage:

1.Client Id  & Tenant Id - Go to App Registrations and click on registered app from list ,copy     below in your local PC :


2. Secret Id - copy its value field which mentioned above

 Create Container and upload File which will be used to download later 

1. Go to storage account -> click Container from left menu then click add and enter lower case container name and click on create button


2. Click added container name in the list and upload file 


We have done with all azure side configuration now lets go to coding part where we are going to get token and pass in authorization header and download uploaded file .

1. Open visual studio and create .net core project and enter project name "AzureServiceTokenAuth" click next and create


2.
open appsettings.json and replace below keys value 

{
  "AppSettings": {
    "grant_type": "client_credentials",
    "client_Id": "clientId",
    "client_secret": "secret(value)",
    "resource": "https://storage.azure.com/.default",
    "msurl": "https://login.microsoftonline.com/tenantId/oauth2/v2.0/token"
  },
  "Logging": {
    "LogLevel": {
      "Default": "Information",
      "Microsoft": "Warning",
      "Microsoft.Hosting.Lifetime": "Information"
    }
  },
  "AllowedHosts": "*"
}


3. Add AppSettings.cs file and enter below code


namespace AzureServiceTokenAuth
{
    public class AppSettings
    {
        public static AppSettings _settings;
        public AppSettings()
        {
            _settings = this;
        }
        public string grant_type { get; set; }
        public string client_Id { get; set; }
        public string client_secret { get; set; }
        public string resource { get; set; }
        public string msurl { get; set; }
       
    }
}


4. Replace startup.cs with below code

using Microsoft.AspNetCore.Builder;
using Microsoft.AspNetCore.Hosting;
using Microsoft.Extensions.Configuration;
using Microsoft.Extensions.DependencyInjection;
using Microsoft.Extensions.Hosting;
using Microsoft.OpenApi.Models;

namespace AzureServiceTokenAuth
{
    public class Startup
    {
        public Startup(IConfiguration configuration,IWebHostEnvironment env)
        {
            var builder = new ConfigurationBuilder()
           .SetBasePath(env.ContentRootPath)
           .AddJsonFile("appsettings.json", optional: true, reloadOnChange: true);
            Configuration = builder.Build();
        }

        public IConfiguration Configuration { get; }

        // This method gets called by the runtime. Use this method to add services to the container.
        public void ConfigureServices(IServiceCollection services)
        {
            services.Configure<AppSettings>(Configuration);
            var appSettingsSection = Configuration.GetSection("AppSettings");
            appSettingsSection.Get<AppSettings>();

            services.AddSingleton<IAzureTokenService, AzureTokenService>();
            services.AddControllers();
            services.AddSwaggerGen(c =>
            {
                c.SwaggerDoc("v1", new OpenApiInfo { Title = "AzureServiceTokenAuth", Version = "v1" });
            });
        }

        // This method gets called by the runtime. Use this method to configure the HTTP request pipeline.
        public void Configure(IApplicationBuilder app, IWebHostEnvironment env)
        {
            if (env.IsDevelopment())
            {
                app.UseDeveloperExceptionPage();
                app.UseSwagger();
                app.UseSwaggerUI(c => c.SwaggerEndpoint("/swagger/v1/swagger.json", "AzureServiceTokenAuth v1"));
            }

            app.UseHttpsRedirection();

            app.UseRouting();

            app.UseAuthorization();

            app.UseEndpoints(endpoints =>
            {
                endpoints.MapControllers();
            });
        }
    }
}


5. Add new class called "AzureTokenResult" with below code
namespace AzureServiceTokenAuth
{
    public class AzureTokenResult
    {      
   
        public string token_type { get; set; }

     
        public string expires_in { get; set; }

        public string ext_expires_in
        {
            get; set;
        }

       
        public string expires_on { get; set; }
     
        public string access_token { get; set; }

    }

    public class TokenStorage // to send back token while downloading file
    {
    public string Token { get; set; }
    }
}


6. Create new class "AzureTokenService" and replace with below code
using Newtonsoft.Json;
using System.Collections.Generic;
using System.IO;
using System.Net.Http;
using System.Threading.Tasks;

namespace AzureServiceTokenAuth
{
    public class AzureTokenService : IAzureTokenService
    {
        private readonly HttpClient _httClient;
        public AzureTokenService()
        {
            _httClient = new HttpClient();
        }
        public async Task<AzureTokenResult> GetToken()
        {
            var dict = new Dictionary<string, string>
                {
                    { "grant_type", AppSettings._settings.grant_type },
                    { "client_id", AppSettings._settings.client_Id },
                    { "client_secret", AppSettings._settings.client_secret },
                    { "scope", AppSettings._settings.resource }
                };

            HttpContent formData = new FormUrlEncodedContent(dict);
            var response = await _httClient.PostAsync(AppSettings._settings.msurl, formData);
            response.EnsureSuccessStatusCode();
            var responseContent = await response.Content.ReadAsStringAsync();
            var result= JsonConvert.DeserializeObject< AzureTokenResult>(responseContent);
            return result;
        }

        public Stream GetStorage(string token)
        {

            _httClient.DefaultRequestHeaders.Add("Authorization", "Bearer " + token);
            _httClient.DefaultRequestHeaders.Add("x-ms-version", "2020-04-08");
            var response = _httClient.GetAsync("azurestorageurl/containername/fileName").Result;
           return response.Content.ReadAsStreamAsync().Result;
        }
    }
}


7. Create new interface "IAzureTokenService" and replace below code

 using System.IO;

using System.Threading.Tasks;

namespace AzureServiceTokenAuth
{
    public interface IAzureTokenService
    {
        Task<AzureTokenResult> GetToken();
        Stream GetStorage(string token);
    }
}

8. Add new controller in controller folder named "AuthTokenController" and replace below code 

using Microsoft.AspNetCore.Mvc;
using Microsoft.Extensions.Logging;
using System.Threading.Tasks;

namespace AzureServiceTokenAuth.Controllers
{
    [ApiController]
    [Route("[controller]")]
    public class AuthTokenController : ControllerBase
    {

        private readonly ILogger<AuthTokenController> _logger;
        private readonly IAzureTokenService _azureTokenService;

        public AuthTokenController(ILogger<AuthTokenController> logger,
            IAzureTokenService azureTokenService)
        {
            _logger = logger;
            _azureTokenService = azureTokenService;
        }

        [HttpGet]
        public IActionResult Get()
        {
            return Ok("success");
        }
        [HttpGet]
        [Route("get-az-token")]
        public async Task<IActionResult> GetToken()
        {

            var result = await _azureTokenService.GetToken();
            return Ok(result);
        }
        [HttpPost]
        [Route("access-storage")]
        public IActionResult GetFiles([FromBody] TokenStorage token)
        {

           var stream= _azureTokenService.GetStorage(token.Token);
            return File(stream, "application/octet-stream", "downloadFile.pdf");
        }
       
    }
}


Now we are done with coding part lets run the project and see the output :

1. Getting token :

Execute above endpoint to get token , copy the below token


call access-storage endpoint and we get your uploaded file in blob storage 


Note : I use storage service just to show how we can use auth token to call azure services ,similarly you can use for other services also.

Thanks and we are done with Auth token and its use.

 you can download all the azure samples code : https://github.com/mkumar8184/azure-sdk-services-samples


Wednesday, June 15, 2022

BlobTrigger in azure function ,Resize files after uploading in blob

 In previous post we saw how to create azure function for HttpTrigger. Now lets see another use of azure function.

Scenario - Suppose you are uploading file in blob either directly from azure portal or through .net code and after upload you want to create thumbnail or resize that file . For this if you will do during upload in .net code then it might take time and user will not be happy with system performance . So to tackle such kind of scenario azure has provided BlobTrigger function. which automatically trigger and resize your file after uploading in blob. if you want to know more about azure function from start please see the previous post.

So Lets see how we can achieve this.

1. Open Visual Studio -> Create New Project -> Search for Azure functions Templates and click Next

1.Enter project name “AzureFunBlobTrigger” and click Next

2.In next section you need to select Trigger Type ,so select Blob Trigger and keep storage emulator in right side , if you want to use azure storage you can browse and choose.


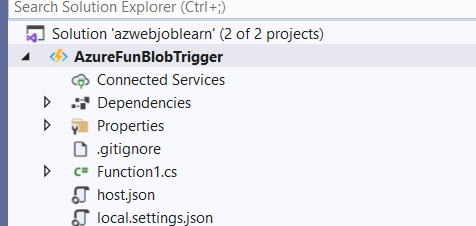
in Solution explorer you will see below


Local.settings.json : In this file configure storage account and runtime framework. It has key-value code. open this file and paste the below code

{

    "IsEncrypted": false,

  "Values": {

    "AzureWebJobsStorage": "your storgate connection string",

    "FUNCTIONS_WORKER_RUNTIME": "dotnet",

    "fnBlob": "your storgate connection string"

  }

}

fnBlob is the key which you are going to use for blob connection.

Function1.cs: Open the function.cs and paste the below code

using Microsoft.Azure.WebJobs;
using Microsoft.Azure.WebJobs.Host;
using SixLabors.ImageSharp;
using SixLabors.ImageSharp.Formats.Jpeg;
using SixLabors.ImageSharp.PixelFormats;
using SixLabors.ImageSharp.Processing;
using System.IO;

namespace AzureFunBlobTrigger
{
    public static class Function1
    {
        [FunctionName("Function1")]
         public static void Run(
               [BlobTrigger("mycontainer/{name}", Connection = "fnBlob")] Stream inputBlob, string name,
               [Blob("resized/{name}", FileAccess.Write, Connection = "fnBlob")] Stream outputBlob, TraceWriter log)
        {
            log.Info($"C# Blob trigger function Processed blob\n Name:{name} \n Size: {inputBlob.Length} Bytes");
         
            ResizeImage( inputBlob, outputBlob, 300,150);
         
        }
        private static void ResizeImage(Stream input, Stream output, int width,int height)
        {
            using (Image image = Image.Load(input))
            {
                image.Mutate(x => x
                        .Resize(new ResizeOptions
                        {
                            Mode = ResizeMode.BoxPad,
                            Size = new Size(width, height) // you can define size what u need
                        }).BackgroundColor(new Rgba32(0, 0, 0)));

                image.Save(output, new JpegEncoder());
            }
        }

    }
}


L Lets understand the below code block

[FunctionName("Function1")]
         public static void Run(
               [BlobTrigger("mycontainer/{name}", Connection = "fnBlob")] Stream myBlob, string name,
               [Blob("resized/{name}", FileAccess.Write, Connection = "fnBlob")] Stream outputBlob, TraceWriter log)


     [FunctionName("Function1")] - function name which you can change with any name .

   [BlobTrigger("mycontainer/{name}" -BlobTrigger is the attribute which trigger the function when any file will get upload in container "mycontainer".

    Connection = "fnBlob")] - storage connection string name which I have defined in local.setting.json

    [Blob("resized/{name}", another container where file will be save after resizing. you dont need to create ,it will be automatically created if not.

   In the above code I have created one function called ResizeImage where I am passing input blob(which has been uploaded ,output blob path and name , size.

   To resize image I am using nuget package called SixLabors.ImageSharp which you can add from package manager. I found this package more clean ,fast and easy to implement.

   Thats all about coding part.

   Lets try to upload file in container from azure portal and see what happens

L   1. Login to azure portal and go to storage account -> container -> mycontainer -> select upload and upload one file. as soon as you upload your file automatically your function will trigger in your local visual studio and resize the file and save in the output folder.

    Before that just run your project from visual studio . you will see below logs if your function run successfully in vs.

   Now let put our debugger in code just to make sure our function is triggered after uploading image in blob.


Now go to mycontainer and upload one image and you will see your local function got triggered.


   now you can see your function gets trigger in the code and resize uploaded image and push to resized container.

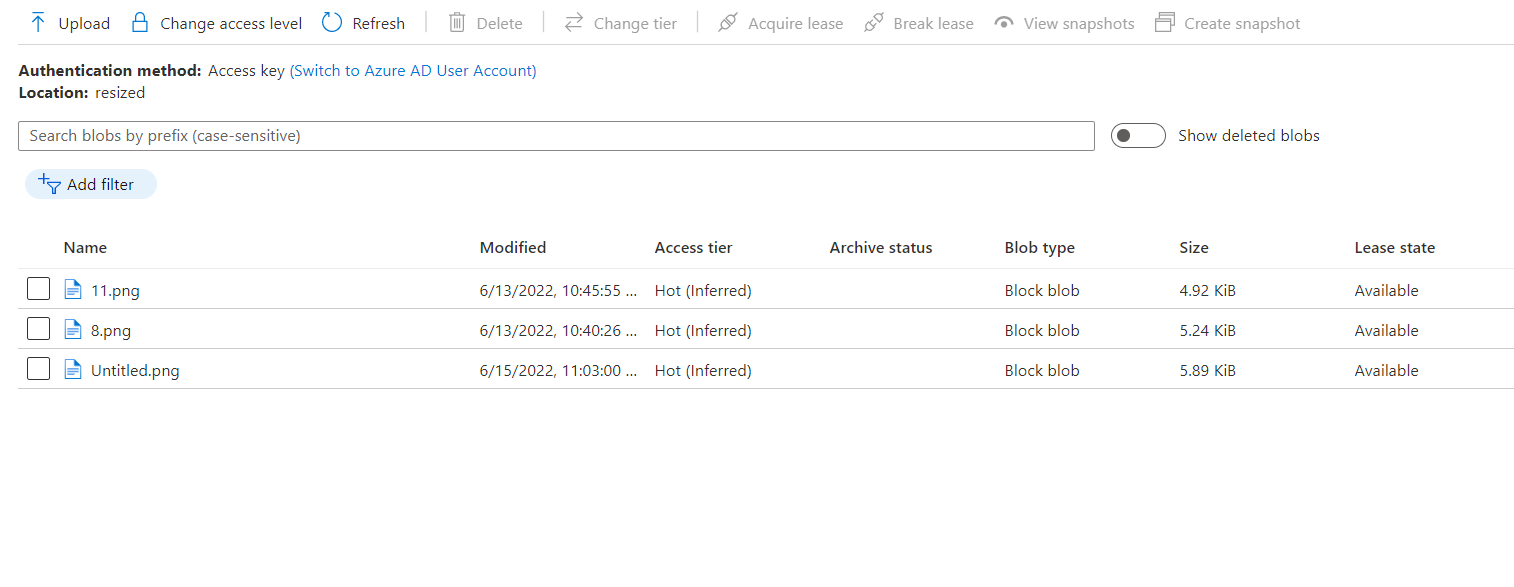
   This is the resized container.


   We are done with blob trigger azure function and this might be the real case for you where you can use azure function  ..

   Thanks and good luck.


Tuesday, June 14, 2022

Create and Use Azure functions in .Net Core

 Azure functions  

What : Azure function is a small pieces of code/small program which runs on cloud. Azure function is serverless i.e. no need to worry about infrastructure ,scaling etc. everything handled by provider for you. Basically it’s a Event triggered code.Keep in mind you should not write huge block of code or use as a replacement of webapi ,function should be lightweight and small piece of code.

Why to Use- We can use azure function when we have requirement to run program which might takes time.

o   File Processing

o   Scheduled Tasks

o   Reminders and Notifications

o   Sending background emails

o   Running background backup tasks

Language/script support

 All types of programming language support like C#,Java, JavaScript etc.

Types :Event triggered code

  •       HTTP trigger
  •       Timer Trigger
  •       Blob Trigger
  •       Event Grid Trigger
  •       Event Hub Trigger
  •       Queue Trigger
  •       Service Bus Trigger and so many other triggers through which azure function can run.

Prerequisites:

  •     Install azure development sdk in visual studio

Here we are going to focus Http trigger and Blob Trigger only.

Http Trigger- As per naming it a http request call , function execute when we send http request

Lets see how to create and use this ,good thing is that we don’t need to deploy azure function for testing during development in visual studio there is storage emulator which can be used for development and testing :

To create follow the steps :

Open Visual Studio -> Create New Project -> Search for Azure functions Templates and click Next

1.      .


1.Enter project name “azfunctionHttpTrigger” and click Next

2.In next section you need to select Trigger Type ,so select HttpTrigger and keep storage emulator in right side , if you want to use azure storage you can browse and choose.

3.In authorization field leave default one i.e function 


In solution explorer you can see project created with 3 files

  •       Function1.cs
  •       Host.json
  •       local.settings.json


Let see uses of these files

Local.settings.json : In this file configure storage account and runtime framework. It has key-value code.

{

    "IsEncrypted": false,

    "Values": {

        "AzureWebJobsStorage": "UseDevelopmentStorage=true",

        "FUNCTIONS_WORKER_RUNTIME": "dotnet"

    }

}

AzureWebJobsStorage : can be replaced with azure storage connection string otherwise for development you can keep as it is.


Host.json : I will explain bit later.

Function1.cs: This is the class where you will put your logic what you want to get done from this app.Since we selected HttpTrigger ,automatically added template .just need to replace required code in the code block. 

Lets rename function name as ‘azhttpTriggeredFunction

Default :

public static class Function1

    {

        [FunctionName("Function1")]

        public static async Task<IActionResult> Run( [HttpTrigger(AuthorizationLevel.Function, "get", "post", Route = null)] HttpRequest req,

            ILogger log)

        {

            log.LogInformation("C# HTTP trigger function processed a request.");
            string name = req.Query["name"];
            string requestBody = await new StreamReader(req.Body).ReadToEndAsync();
            dynamic data = JsonConvert.DeserializeObject(requestBody);
            name = name ?? data?.name;
            string responseMessage = string.IsNullOrEmpty(name)
                ? "This HTTP triggered function executed successfully. Pass a name in the query string or in the request body for a personalized response."
                : $"Hello, {name}. This HTTP triggered function executed successfully.";
            return new OkObjectResult(responseMessage);

        }
    }


Now lets run and see if function is working or not.press F5 and see the output.

.

If you observe the above output  ,you can see the url for http call. Copy this url and paste in browser

http://localhost:7071/api/azhttpTriggeredFunction and you can see the below output


Now Lets see details in this function :

[HttpTrigger(AuthorizationLevel.Function, "get", "post", Route = null)]


Http request method -get ,post. At template creation time it added by default. Can be removed one of them as required.

Route – This is the endpoint for http request.You can change the route name as "routeName"/{name}(query string). So url with new route name will be formed.

If you have noticed in the url http://localhost:7071/api/azhttpTriggeredFunction  ,

api has been appended . this is the default route prefix which is added. If you need to change this you can change in host.json.


Lets change route prefix as apiPrefix

http://localhost:7071/apiPrefix/azhttpTriggeredFunction new url with changed prefix.

Pass query string value in the url http://localhost:7071/apiPrefix/azhttpTriggeredFunction?name=%27manoj%27 and out put will be below


Thats it for httpTriggered function .In next section will see BlobTriggered.


 you can download all the azure samples code : https://github.com/mkumar8184/azure-sdk-services-samples

Friday, June 10, 2022

Call WebJob from .Net Core Web Api

In previous tutorial we had created a webjob which can be run manually by click on Run in azure portal. But most of the cases we need to trigger this job when an event gets triggered. See the previous tutorial to create web jobs Create webjobs in .net core. I will use same web jobs here.

In this tutorial we will see how to call webjob from our web api call

Its a simple as we call any other services/api . 

1. Go to azure portal -> appservice->webjob-> click on proprties .from right panel copy webhook ,username and password in you local . 

Now open visual studio and create webapi project and paste below code 

 [HttpPost]
        [Route("webjobstest")]
        public async Task<IActionResult> CallWebJobs()
        {
            HttpClient _httpClient = new HttpClient();
            _httpClient.BaseAddress = new System.Uri("xxxxxxxx.scm.azurewebsites.net/api/");
            var bytArray = Encoding.ASCII.GetBytes("username:pwd");
            _httpClient.DefaultRequestHeaders.Authorization = new System.Net.Http.Headers.AuthenticationHeaderValue("Basic", Convert.ToBase64String(bytArray));
            var response = await _httpClient.PostAsync("triggeredwebjobs/azwebjoblearn/run", null);

            return Ok(response);
       
        }

Now when you call the api above webjob will be triggered , in case of success we get response  202(accepted) code.


Convert Html to Pdf in azure function and save in blob container

 In this post  I am going to create an azure function ( httpTrigger ) and send html content  which will be converted into PDF and save in bl...